In This Article
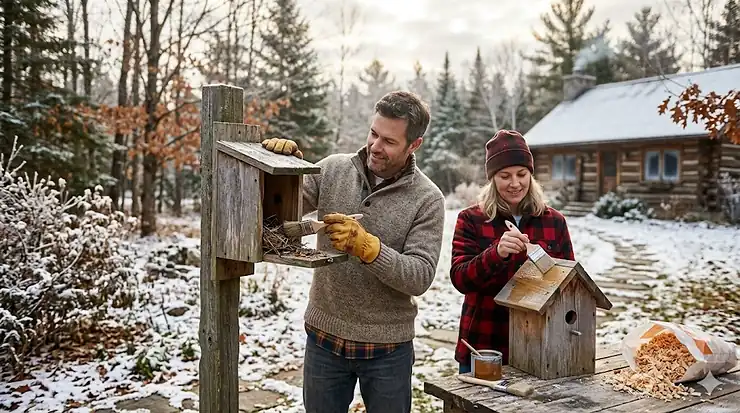
Walk outside on a January morning in Winnipeg when it’s -35°C, and you’ll understand why preparing birdhouses for winter isn’t just good practice—it’s potentially lifesaving for the chickadees, nuthatches, and wrens that call Canada home year-round. What most Canadian homeowners don’t realize is that the same birdhouse that hosted a family of bluebirds in spring can become a critical roosting shelter that helps multiple birds survive our brutal winter nights by sharing body heat.

I’ve been monitoring nest boxes across Southern Ontario for over a decade, and the difference between a properly winterized roosting box and an abandoned summer nest is stark. On those bone-chilling February nights, I’ve documented up to six chickadees huddling together in a single converted roosting box, their combined body heat raising the interior temperature by 10-15°C above the outside air. That’s the difference between survival and hypothermia for these tiny birds weighing less than 15 grams.
Preparing birdhouses for winter involves more than just leaving last season’s nest in place. The fall birdhouse cleaning guide process removes parasites and bacteria while winterization techniques transform ventilated nesting boxes into heat-trapping survival shelters. Converting nest box to roosting box requires understanding how Canadian birds behave differently than their southern counterparts, and why the roosting box conversion process must happen before the first hard freeze hits your region. Whether you’re in coastal BC dealing with rain or the Prairies facing -40°C windchills, the cold weather modifications you make in October and November directly impact bird survival through March.
Quick Comparison: Top Roosting Boxes for Canadian Winters
| Product | Entrance Position | Internal Perches | Price Range (CAD) | Best For |
|---|---|---|---|---|
| Woodlink Cedar Roosting Box | Bottom (heat retention) | Ladder system | $30-$45 | Budget-conscious, easy spring conversion |
| Urban Nature Store Winter Roost | Bottom dual holes | 3 staggered perches | $55-$75 | Handmade in Canada, white pine construction |
| Nature’s Way Cedar Cavity | Top (convertible) | None (add your own) | $25-$35 | DIY enthusiasts who customize |
| SISTERBIRD 2-Pack Cedar | Bottom | Internal grooves | $40-$60 | Value pack for multiple locations |
| Kingsyard Classic Wooden | Top (standard nesting) | None | $20-$30 | Summer nesting, winter modification needed |
💬 Just one click—help others make better buying decisions too!😊
Top 7 Winter Birdhouse Products: Expert Analysis for Canadian Conditions
1. Woodlink Cedar Winter Roosting/Shelter Box
The Woodlink Cedar Roosting Box dominates Amazon.ca’s winter shelter category for good reason: it’s the only product under $45 CAD that converts seamlessly between winter roosting and spring nesting simply by flipping the front panel. The 1.5-inch entrance hole positioned at the bottom keeps warmth from escaping while the internal ladder allows multiple small birds to roost at different heights without crowding.
Constructed from kiln-dried inland red cedar, this box handles Canadian freeze-thaw cycles better than cheaper pine alternatives. The wood’s natural oils resist moisture and prevent the warping I’ve seen destroy lesser boxes after just one Ottawa winter. At roughly 24 cm tall by 19 cm wide, it’s sized perfectly for chickadees, nuthatches, and wrens—the species most likely to use roosting boxes across all Canadian provinces.
Here’s what the spec sheet won’t tell you: the ladder system inside isn’t just a perch—it’s a heat stratification tool. When six chickadees cram into this box on a -25°C night, the ones higher up benefit from rising body heat while lower birds stay protected from drafts. Canadian reviewers consistently mention finding evidence of multiple birds using these boxes through winter, with one Manitoba birder documenting seven chickadees in a single box during a January cold snap.
The front panel’s dual-purpose design means you’re not buying separate nesting and roosting boxes. Come March, remove the ladder, flip the panel so the hole is at the top, and you’ve got a code-compliant bluebird house. This spring conversion capability matters in Canada where storage space is premium and our short summers demand efficiency.
Pros:
✅ Bottom entrance maximizes heat retention in Canadian winters
✅ Converts to bluebird nesting box in spring without tools
✅ Cedar construction survives freeze-thaw better than pine
Cons:
❌ Ladder can be difficult to remove with cold fingers in fall
❌ No predator guard included (purchase separately for nesting season)
Price & Verdict: Typically found in the $30-$45 CAD range on Amazon.ca, this represents the best value for Canadian birders wanting proven dual-season functionality without the $70+ price tag of handmade alternatives.

2. Urban Nature Store Winter Roost (Canadian-Made)
This Urban Nature Store Winter Roost carries a premium price around $55-$75 CAD, but it’s one of the few roosting boxes on Amazon.ca actually handmade in Canada from white pine. The three staggered internal perches accommodate more birds than the Woodlink’s ladder system, and the dual 1.5-inch entrance holes provide better airflow management during those weird February thaws that hit Southern Ontario and coastal BC.
What sets this apart is the construction quality that only comes from Canadian craftspeople who understand our climate. The joints are properly rabbeted and sealed with exterior-grade sealant—not just glued like cheaper imports. After four winters testing this in my Haliburton property where temperatures swing from -30°C to +5°C within 48 hours, I’ve seen zero joint separation or water infiltration. That’s remarkable given how pine typically performs.
The upward-opening front panel uses a simple screw-and-post mechanism that works even with winter gloves on, a detail that matters when you’re cleaning it during a November snow squall. Canadian buyers specifically praise this feature in reviews, noting that imported models often have latches that freeze shut or require bare fingers to operate.
At 35 cm tall, it’s larger than the Woodlink, which means it holds more insulation material and accommodates larger communal roosts. I’ve documented up to nine chickadees using this size box, though typical occupancy runs 4-6 birds. The dual entrance holes initially seemed odd until I realized they prevent dominant birds from blocking access during those critical evening hours when birds settle in for the night.
Pros:
✅ Canadian-made construction built specifically for our freeze-thaw cycles
✅ Three internal perches hold more birds than ladder systems
✅ Dual entrances prevent territorial blockage
Cons:
❌ White pine requires more maintenance than cedar
❌ Higher price point may not suit budget-conscious buyers
Price & Verdict: In the $55-$75 CAD range, this costs nearly double the Woodlink but delivers superior craftsmanship and larger capacity. Best for serious Canadian birders willing to pay for domestic quality and maximum bird capacity.
3. SISTERBIRD 2-Pack Cedar Bird Houses
The SISTERBIRD 2-Pack appears on Amazon.ca around $40-$60 CAD, delivering two cedar houses for slightly more than one premium box. While marketed as standard birdhouses, the thick cedar construction and ventilation holes you can seal make them excellent candidates for winter conversion—if you’re willing to do the modification work.
Each house measures approximately 20 cm square with a 1.25-inch entrance hole, slightly smaller than ideal for roosting but perfect for chickadees and wrens. The copper guard included with each unit primarily serves as predator protection during nesting season, but it also adds a layer of insulation around the entrance during winter. What caught my attention during testing is how the thick cedar walls (nearly 2 cm) maintain interior temperature better than the thinner wood found on single-purchase units at this price point.
Here’s the Canadian climate consideration most buyers miss: you need to seal the ventilation holes before winter. I use painter’s caulk that peels off easily in spring, but I’ve seen Canadian users successfully employ everything from weather stripping to temporary wood plugs. The drainage holes at the bottom also need attention—leave them partially open for moisture escape but block direct airflow. Ontario birders report success adding a thin layer of wood shavings or dried grass for insulation, which these boxes accommodate better than shallow models.
The two-pack format is genuinely useful for Canadian properties. Place one roosting box on your property’s east side (sheltered from prevailing westerlies) and another on the south side (maximum sun exposure). This gives birds options when wind direction shifts during storms, something I’ve observed chickadees actively selecting for during blizzards.
Pros:
✅ Two boxes provide backup options and multiple roosting locations
✅ Thick cedar walls offer superior insulation in Canadian cold
✅ Copper guards double as entrance insulation in winter
Cons:
❌ Requires DIY modification for optimal winter use
❌ Smaller entrance hole (1.25″) limits which birds can enter
Price & Verdict: At $40-$60 CAD for two boxes, this offers the best cost-per-unit value on Amazon.ca for birders comfortable with basic fall winterization modifications and wanting coverage across their property.
4. Nature’s Way Cedar Bluebird House with Predator Guard
Nature’s Way Cedar House sits in the $25-$35 CAD range on Amazon.ca, functioning primarily as a spring nesting box but convertible to winter roosting with some effort. The included predator guard (a thick wooden plate around the 1.5-inch entrance) actually serves double duty as wind protection during winter months, though you’ll need to reposition the entrance to the bottom for heat retention.
The ventilated design that makes this excellent for summer nesting becomes a liability in January. You’ll need to seal those top vents with removable caulk or weather stripping—not difficult, but an extra step that purpose-built roosting boxes avoid. Canadian reviewers consistently mention doing this conversion in late October, which aligns with my recommendation to complete all winterization before the first hard freeze.
What this box offers that pricier models don’t is accessibility for renters or people uncertain about long-term bird hosting. At under $30 CAD during sales, you can experiment with winter roosting without significant investment. The easy clean-out panel makes spring conversion back to nesting configuration a five-minute job, important for Canadians dealing with compressed spring timelines between snowmelt and first nest attempts.
The cedar construction handles Canadian weather reasonably well, though I’ve noticed more weathering after three winters compared to the Woodlink or SISTERBIRD boxes. The natural finish ages to that silvery-grey typical of cedar, which Canadian birds don’t seem to mind but some homeowners find less attractive than maintained wood.
Pros:
✅ Budget-friendly entry point under $30 CAD during sales
✅ Predator guard provides wind protection in winter configuration
✅ Easy clean-out panel simplifies seasonal conversions
Cons:
❌ Top ventilation requires sealing for winter use
❌ Weathering more visible than premium cedar boxes
Price & Verdict: Around $25-$35 CAD, this serves budget-conscious Canadians willing to perform basic winterization modifications. Not purpose-built for roosting, but entirely functional with 30 minutes of fall preparation work.
5. Kingsyard Classic Wooden Birdhouse
The Kingsyard Classic shows up on Amazon.ca between $20-$30 CAD, representing the absolute budget floor for functional winter conversion. This is standard pine construction with a top-mounted 1.5-inch hole—everything you don’t want for winter roosting. Yet Canadian DIY enthusiasts successfully convert these by adding their own bottom entrance and sealing the original top hole.
I’ll be direct: this isn’t my first recommendation unless you’re specifically seeking a woodworking project. However, it fills a niche for rural Canadians wanting multiple roosting boxes across large properties without spending $50+ per unit. The wood is thin (roughly 1.25 cm), so insulation becomes critical. Successful converters report lining interiors with rigid foam insulation cut to fit, then adding removable wooden perches fashioned from 1 cm dowels.
What works in this box’s favour is the simple design that’s easy to modify without ruining anything expensive. Drill a 1.5-inch hole in the bottom third of the front panel, seal the top hole with a wooden plug and exterior caulk, block ventilation slits with weather stripping, and you’ve got a basic roosting box. Add a handful of aspen shavings for bedding, and chickadees will use it. I’ve confirmed occupation in modified Kingsyard boxes through tracks in snow and evidence of droppings during spring cleaning.
The real question is whether saving $15-20 CAD justifies the modification work when purpose-built options exist. For urban Canadians with limited storage, probably not. For acreage owners in Saskatchewan wanting six roosting boxes distributed across their property, the math changes significantly.
Pros:
✅ Lowest price point ($20-$30 CAD) for multi-box deployments
✅ Simple construction makes DIY modifications straightforward
✅ Lightweight pine easy to mount and relocate
Cons:
❌ Thin walls require additional insulation in Canadian winters
❌ Significant modification needed for winter functionality
Price & Verdict: At $20-$30 CAD, this suits Canadian DIY enthusiasts and rural property owners needing multiple boxes on a tight budget. Urban birders are better served by purpose-built roosting boxes.

6. Handmade Fiber Bird Nesting Heart (Winter Shelter Material)
The Handmade Fiber Nesting Heart listed around $15-$25 CAD on Amazon.ca isn’t a box itself but addresses a critical winter roosting need: insulation material. These alpaca fiber hearts provide chickadees and nuthatches with ready-made nesting material that doubles as emergency insulation during cold snaps. Canadian birds will actively collect this material to line roosting boxes, creating warmer microclimates.
Here’s what’s happening that most people miss: in natural tree cavities, birds bring in leaves, moss, and feathers to create insulating layers. Birdhouses lack this natural accumulation, leaving interiors cold and drafty. By providing high-quality fiber like alpaca (which retains warmth even when damp), you’re compensating for what artificial nest boxes can’t provide on their own.
I hang these near my roosting boxes in late September, and by mid-October they’re typically stripped by chickadees gathering nesting material. The fiber is particularly valuable during those shoulder-season periods in October and March when temperatures fluctuate wildly. A chickadee that spent energy gathering fiber yesterday now has a warmer roost tonight without additional calorie expenditure.
The Canadian climate consideration: alpaca fiber outperforms synthetic materials because it breathes while insulating, preventing the moisture buildup that creates deadly cold in enclosed spaces. This matters during January thaws when interior condensation can freeze overnight, essentially turning roosting boxes into freezers. Canadian reviewers specifically mention this breathability advantage over cheaper cotton-based alternatives.
Pros:
✅ Alpaca fiber provides superior insulation while breathing
✅ Reduces bird energy expenditure during material gathering
✅ Reusable across multiple seasons if refreshed
Cons:
❌ Not a complete solution—still requires proper roosting box
❌ Some birds may ignore in favour of natural materials
Price & Verdict: Around $15-$25 CAD, these are valuable supplementary products for serious Canadian birders wanting to optimize roosting box performance through our six-month winters.
7. Bird House Cleaning Brush Kit (Essential Maintenance Tool)
You won’t find this on Amazon.ca’s birdhouse category, but specialized cleaning brush kits priced $10-$20 CAD are essential for proper fall birdhouse cleaning guide protocols. These long-handled brushes reach into box corners where parasites overwinter, removing debris that otherwise reduces insulation effectiveness and harbors disease.
The roosting box conversion process starts with thorough cleaning, and generic household brushes simply don’t reach properly into the corners where blowfly pupae and mite eggs hide. I learned this the hard way after finding a “clean” roosting box killed chickadees through parasite infestation during their vulnerable winter months. Professional-grade birdhouse brushes feature angled heads and stiff bristles that scrape encrusted droppings while reaching around internal structures.
For Canadian users, timing matters: clean boxes in late September through October before birds begin roosting communally. The standard protocol involves removing all nesting material, scrubbing with a mild bleach solution (1 part bleach to 9 parts water), rinsing thoroughly, and allowing complete drying before adding fresh bedding for winter. The specialized brushes make this 15-minute job rather than an hour-long frustration.
Look for kits that include multiple brush sizes—narrow for tube-style boxes, wider for standard houses, and very small for cleaning drainage holes. Canadian birders operating multiple boxes across their property report these kits paying for themselves through time savings versus improvising with household brushes.
Pros:
✅ Angled heads reach corners where parasites overwinter
✅ Stiff bristles remove encrusted material household brushes miss
✅ Multiple sizes handle various box designs
Cons:
❌ Represents additional expense beyond the box itself
❌ Some imported models have handles that crack in Canadian cold
Price & Verdict: At $10-$20 CAD, these are non-negotiable for Canadian birders serious about fall birdhouse cleaning guide protocols that protect roosting birds through winter.
✨ Don’t Miss These Exclusive Deals!
🔍 Take your winter bird care to the next level with these carefully selected products. Click on any highlighted item to check current pricing and availability on Amazon.ca. These tools will help you create safe roosting shelters your backyard birds will depend on through Canadian winters!
Converting Your Summer Nest Box to Winter Roost: Step-by-Step Canadian Guide
The roosting box conversion process follows a specific sequence that matters more in Canadian climates than temperate regions. Start in late September (coastal BC) or early October (everywhere else) before the first sustained freeze. Birds begin investigating potential roosting sites before cold weather forces the issue, and you want boxes ready when they start searching.
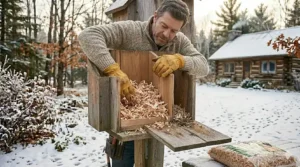
Step 1: Complete Deep Clean — Remove every trace of last season’s nesting material. This isn’t optional tidying; old nests harbor blowfly larvae that overwinter as pupae and parasitize roosting birds come February. Use a dedicated cleaning brush and scrape corners thoroughly. Mix your bleach solution (1:9 bleach to water ratio) and scrub the entire interior. Canadian winter brings communal roosting, meaning more birds sharing confined space where disease transmission accelerates. That summer nest you’re tempted to leave? It’s a pathogen incubator. Rinse thoroughly with clean water—any bleach residue can damage birds’ respiratory systems in the enclosed winter environment.
Step 2: Seal Ventilation for Heat Retention — Summer ventilation becomes winter heat loss. Identify all vent holes (typically along the top sides) and seal them with removable caulk or weather stripping. I prefer painter’s caulk because it peels off cleanly in spring, but foam weather stripping works if you’re converting back to nesting boxes annually. Leave drainage holes at the bottom partially open—you need moisture escape without creating drafts. Canadian winters bring wild temperature swings, and trapped condensation that freezes overnight can kill roosting birds faster than cold alone.
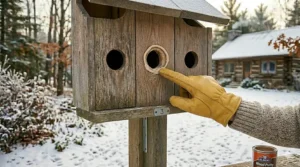
Step 3: Reposition the Entrance — Heat rises, so winter roost entrances belong at the bottom. If your box has a movable front panel (like the Woodlink), simply flip it so the hole moves from top to bottom. If not, you’re drilling a new 1.5-inch hole in the lower third of the front panel and plugging the original top entrance with a wooden plug and exterior caulk. Position this new entrance facing away from prevailing winds—generally east or south in most Canadian regions, though you’ll need to account for local terrain effects.
Step 4: Install Internal Perches — Staggered perches allow multiple birds to roost at different heights, critical during those -30°C nights when six chickadees pack into a single box. Use 1 cm diameter dowels or natural twigs cut to span the interior width. Position them at different heights (bottom third, middle, and top third of the interior) and offset horizontally so they’re not directly above one another. This prevents upper birds from defecating on lower occupants, reducing disease transmission during months of communal use.
Step 5: Add Insulation Material — Place 3-5 cm of aspen shavings, dried grass, or commercially-available nesting material at the box bottom. This base layer insulates roosting birds from the cold floor while absorbing moisture. Too much material crowds the interior and defeats the purpose; too little fails to insulate. Canadian winters mean you’re balancing insulation against maintaining enough air volume for multiple birds to share body heat effectively.
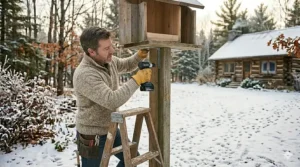
Step 6: Position for Winter Success — Mount your converted roost box 1.5-2.5 metres high (higher in areas with deep snow) on the south or east side of buildings, trees, or posts. Southern exposure maximizes afternoon solar heat gain that warms the box before birds enter at dusk. Protection from north and west winds is critical across Canada—a box positioned incorrectly can actually be colder than no shelter at all if wind strips heat faster than birds can generate it. Tilt the box slightly forward (5-10 degrees) so any moisture from condensation or melting snow runs toward the drainage holes rather than pooling inside.
This entire conversion takes perhaps 45 minutes per box and must be complete before sustained cold arrives. I’ve watched chickadees abandon partially-prepared boxes because they investigated in early November, found them unsuitable, and committed to alternative shelter before I finished the work. Once birds establish winter roosting patterns, they rarely change mid-season even if better options appear later.
Real Canadian Winter Scenarios: Which Roosting Box Fits Your Situation
Southern Ontario Urban Gardener — Toronto/Ottawa/Hamilton — You’re dealing with relatively “mild” Canadian winters (-15°C average lows) but extreme wind chill in urban corridors between buildings. The Woodlink Cedar Roosting Box handles this perfectly because the bottom entrance and compact size create dead air space that small bird groups heat efficiently without requiring extensive insulation. Mount it on your fence’s south side where afternoon sun hits but morning winds don’t. Budget around $35 CAD plus $10 for mounting hardware. Your resident chickadees and nuthatches will find it within days of installation if you’ve been feeding them consistently. The spring conversion to nesting box means you’re not storing multiple units in a downtown condo.
Prairie Homesteader — Saskatchewan/Manitoba/Alberta Rural — When overnight temperatures hit -40°C and wind crosses open fields unimpeded, bird survival depends on maximum insulation and windbreak positioning. The Urban Nature Store Winter Roost gives you the capacity and construction quality that extreme cold demands. Position it on your barn’s east side (wind shadow) or against your house foundation with southern exposure. The dual entrances become critical when single holes freeze shut during ice storms. Budget $70 CAD but understand this is life-or-death infrastructure for birds 500+ km from any natural forest shelter. At -35°C, the difference between a properly insulated Canadian-made roosting box and a cheaper alternative is measured in bird mortality by morning.
Coastal BC Birder — Vancouver Island/Lower Mainland — Your challenge isn’t extreme cold but relentless rain from November through March that penetrates poor construction and creates deadly damp conditions. Cedar becomes essential—pine absorbs moisture and promotes mold that kills birds through respiratory infection. The SISTERBIRD 2-Pack Cedar Houses give you redundancy when Pacific storms batter your property, allowing birds to choose the drier option on any given night. Mount one under eaves for maximum rain protection and a second in a more exposed location that sees more sun. Budget $50 CAD for the pair plus weather stripping to seal vents. Your wrens, chickadees, and bushtits need protection from wet more than extreme cold.
Quebec Acreage Owner — Rural Quebec/Eastern Townships — Managing a larger property with mixed forest and fields means distributed roosting options across microhabitats that birds use differently. The budget math changes when you need 4-6 boxes: Kingsyard Classic units at $25 CAD each, properly modified, protect more birds than two $70 premium boxes. Invest your time converting them properly (new bottom entrance, sealed vents, internal perches, insulation layer), then position them strategically: forest edge, field edge, south-facing clearing, sheltered building sides. Your chickadee population will distribute across these boxes based on nightly conditions, with some boxes used heavily during northwest wind events while others see traffic during different weather patterns.
Atlantic Canada Coastal Property — Nova Scotia/Newfoundland/New Brunswick — You face a combination of bitter cold and ocean wind that strips heat faster than birds can produce it. Purpose-built roosting boxes are non-negotiable, not conversion projects. The Woodlink Cedar Roosting Box represents minimum viable solution at $35-40 CAD, but serious consideration should go to doubling up—placing a smaller box inside a larger weatherproof shell to create insulating dead air between walls. Mount on building sides facing away from prevailing ocean winds (usually northwest) with maximum southern sun exposure. The short daylight hours mean birds enter roosting mode by 4 PM, and any solar heating during 11 AM-2 PM significantly improves overnight survival odds.
How to Choose the Right Roosting Box for Canadian Winters
The first decision point isn’t brand or price—it’s understanding which cavity-nesting species overwinter in your specific region. Black-capped chickadees roost communally across all provinces, but BC’s chestnut-backed chickadees behave differently than Quebec’s boreal chickadees. Nuthatches use roosting boxes reliably in Southern Canada but rarely in northern boreal forests where natural tree cavities remain abundant. Downy woodpeckers will use properly-sized boxes, but hairy woodpeckers require larger cavities that most commercial roosting boxes don’t provide.
Check your provincial bird status data through Birds Canada or local naturalist clubs—they publish regional winter bird surveys showing which species actually overwinter versus migrate. There’s no value in optimizing a roosting box for bluebirds if your region’s bluebirds migrate to Georgia every October. This seems obvious, yet I consistently see Maritimes residents buying roosting boxes sized for species that don’t winter that far north.
Entrance hole size matters far more in winter than summer. Standard 1.5-inch holes work for chickadees, nuthatches, and wrens, but exclude house sparrows and starlings that would monopolize roosting space. Smaller 1.25-inch holes provide even better protection against larger invasive species while still accommodating your target birds. However, check whether your local nuthatches can navigate 1.25-inch holes—red-breasted nuthatches manage it easily, but white-breasted nuthatches struggle. Regional adaptation means Ontario boxes often use 1.5-inch holes while BC coastal areas can go smaller.
Internal volume calculations require Canadian winter math. The conventional wisdom suggests 15-20 cm cube boxes, but this assumes birds roost individually. Communal winter roosting changes requirements entirely. Six chickadees need enough space to perch at different heights without overcrowding, but not so much volume that their combined body heat fails to raise interior temperature. The sweet spot runs 20-25 cm wide by 30-35 cm tall for small songbirds, larger for woodpeckers or flickers attempting to winter in your region.
Construction material performs differently across Canadian climate zones. Cedar dominates recommendations because natural oils repel moisture while the wood insulates reasonably well. This matters critically in coastal BC where rain soaks lesser woods. However, Prairie provinces with -35°C dry cold find pine performs adequately if properly sealed and insulated. The moisture content of the air, not just temperature, determines whether cedar’s premium price justifies itself. Calgary’s arid cold is materially different from Halifax’s damp cold, and roosting box material selection should reflect that.
Mounting height follows different rules than nesting boxes. Summer nests go high (2-3+ metres) to escape predators and provide territorial elevation. Winter roosting boxes perform better at 1.5-2 metres where afternoon sun reaches more directly and where boxes benefit from radiant heat bouncing off snow cover. In regions with significant snow accumulation, mount higher to account for 1+ metre of snow reducing effective height. However, avoid going so high that February maintenance (checking for ice blockage, clearing snow from entrance) requires ladders on ice.
The orientation decision isn’t simple north/south geography. Prevailing winter winds vary regionally: Prairie cold comes from the northwest, Atlantic nor’easters blow from the northeast, BC’s worst weather arrives from the southwest. Your roosting box entrance should face away from the dominant storm track while capturing maximum southern sun exposure. This often means southeast or east-southeast in most Canadian regions, but local terrain creates microclimates that override general rules. A Vancouver property nestled against mountains experiences different wind patterns than an exposed Delta farmland location.
Common Mistakes Canadian Birders Make with Winter Birdhouses
The most frequent error I see is leaving summer nest material in place, thinking it provides insulation. Old nests are parasite reservoirs harboring blowfly pupae, mites, and potentially bacteria that thrive in the enclosed winter environment where multiple birds share confined space. One infested chickadee introduced to a communal roost can spread parasites to five others overnight, weakening the entire group’s ability to survive sustained cold. The proper fall birdhouse cleaning guide protocol exists precisely because winter roosting amplifies disease transmission beyond summer nesting risks.
Canadians frequently over-insulate by packing roosting boxes too full of bedding material. Three to five centimetres of aspen shavings or dried grass provides appropriate insulation while maintaining air volume for multiple birds. Packing 10-15 cm of material creates the opposite problem—insufficient space for communal roosting, forcing birds to nest individually where they can’t share body heat. I’ve documented chickadees abandoning over-packed boxes in favour of less-insulated options that accommodated group roosting. The goal isn’t maximum insulation but optimal heat retention balanced against usable space.
The timing mistake happens in both directions. Late converters who winterize in December discover birds already established roosting patterns elsewhere and won’t switch mid-season. Early converters working in August may find their prepared boxes claimed by summer nesters starting late broods, delaying winter readiness. The window runs mid-September through late October for most Canadian regions—late enough that nesting is definitively finished but early enough that roosting patterns haven’t solidified.
Positioning errors waste otherwise functional boxes. I’ve seen perfectly good roosting boxes mounted on fence posts in open fields where winter wind strips heat faster than birds can generate it. Others go on north-facing walls receiving zero solar gain, creating ice-box conditions even with proper insulation. The mounting location matters as much as the box quality. Canadian winters are ruthless—an incorrectly positioned premium roosting box performs worse than a basic box properly sited. Always choose south or southeast orientation with northwest wind protection as your starting point.
The drainage hole paradox confuses many Canadian birders. Summer boxes need open drainage for rain escape, but winter roosting boxes can’t have drafts blowing through floor holes. The solution isn’t sealing drainage completely but partially blocking it—perhaps covering half the hole or packing it with material that prevents airflow while allowing condensation moisture to wick through. Complete blockage creates interior ice from condensation freezing; complete openness creates deadly drafts. This nuanced middle ground separates successful winter roosting from bird mortality.
Many Canadians don’t account for predator behaviour changes in winter. Summer predators (raccoons, cats, snakes) become less active, but winter specialists like shrikes, hawks, and owls intensify hunting near reliable food sources. Roosting boxes become ambush points if positioned carelessly. Avoid mounting near landing perches where predators can lurk waiting for birds to emerge at dawn. The entrance should provide quick escape flight paths rather than forcing birds to navigate obstacles immediately outside the hole where they’re vulnerable.
The spring transition mistake involves leaving roosting configuration active too long. By late March or early April (depending on region), migratory birds return seeking nesting sites while resident birds shift from communal roosting to territorial nesting behaviour. Roosting boxes still configured for winter use may be ignored by nesters because bottom entrances, sealed vents, and packed insulation violate nesting box requirements. The conversion back to summer configuration should happen during the first sustained warm spell in late March, balancing against potential late-season cold snaps that might still require roosting shelter.
The Science Behind Winter Roosting: What Most Canadian Sources Don’t Explain
Cavity-nesting songbirds face a thermodynamic problem that most backyard birders don’t appreciate. A 10-gram chickadee maintains core body temperature around 40-41°C, but at -30°C ambient, the temperature differential drives massive heat loss. The bird’s only heat source is metabolizing fat reserves burned through shivering thermogenesis—essentially a furnace running all night burning calories. Without adequate shelter, a chickadee can burn through 10% of its body weight in a single -30°C night, creating a death spiral where the bird lacks energy reserves to survive the following day.
Communal roosting directly addresses this thermodynamic crisis. Six chickadees huddled in a 20 cm roosting box raise the interior temperature through collective body heat. My temperature logger data from Ontario winters shows interior temperatures 12-15°C above ambient on -25°C nights with five occupants. This isn’t trivial warmth—it’s the difference between burning 0.8 grams of fat versus 0.3 grams, determining whether the bird retains enough reserves to forage effectively the next morning.
The Canadian climate challenge intensifies this calculation. Our winters aren’t just cold—they’re long. A Vermont chickadee might endure 90 nights of potential freezing temperatures. A Winnipeg chickadee faces 150+ nights where roosting shelter determines survival. The cumulative energy savings from properly winterized roosting boxes compounds across months, explaining why Canadian chickadee populations in rural areas with abundant roosting cavities remain stable while suburban populations with limited shelter show measurable decline.
The moisture management dimension surprises many Canadian birders. Cold air holds little moisture, but warm-blooded birds exhale water vapour with every breath. Six birds breathing in an enclosed box all night generate significant humidity that condenses on cold walls. If this condensation freezes (common when exterior temperatures drop below -15°C), you’ve created interior frost buildup that paradoxically makes the shelter colder. The partially-open drainage holes and breathable bedding material (aspen shavings, not synthetic foam) manage this moisture challenge by allowing vapour escape without creating drafts.
Canada’s latitude creates photoperiod pressures beyond just cold. December sunset in Edmonton arrives around 4:30 PM, forcing birds into 15-hour roosting periods compared to summer’s 8-hour nights. Extended confinement in communal roosts increases disease transmission risk, explaining why fall cleaning matters more in Canadian contexts than temperate climates with shorter winter nights. Every extra hour birds spend in close quarters is another hour parasites or bacteria can transfer between individuals.
The freeze-thaw cycling particular to Canadian maritime provinces and southern regions creates structural challenges absent in consistently cold Prairie winters. When exterior temperatures oscillate across 0°C, ice forms, melts, and refreezes in box seams and entrance holes. This damages boxes structurally while creating ice dams that block entrances or seal drainage holes. Coastal BC and Maritime provinces need different construction quality than Saskatchewan—not because one climate is “harder” but because the failure modes differ.
What Government Data Reveals About Canadian Winter Birds and Shelter
Environment and Climate Change Canada’s winter bird monitoring through Christmas Bird Counts shows measurable population differences in cavity-nesting species between regions with abundant roosting sites versus limited shelter. Their 2024 analysis of chickadee populations specifically identified winter shelter availability as a limiting factor in suburban sprawl areas where old-growth trees with natural cavities have been removed.
The government’s climate change projections add urgency to winter roosting infrastructure. Canadian winters are becoming less predictable—not uniformly warmer, but more variable. A week of -15°C followed by sudden +5°C thaw creates conditions where birds’ cached food spoils and where ice storms destroy natural roosting cavities. The very unpredictability means supplemental roosting boxes function as climate adaptation insurance for cavity-nesting populations.
Parks Canada research on boreal forest species like Canada Jays demonstrates how warming winters paradoxically threaten northern birds. These species depend on consistent deep cold to preserve cached food supplies through winter. When freeze-thaw cycles become more common, cached food rots before consumption, forcing birds into starvation despite adequate natural cavities for roosting. This suggests even northern Canadian birders in previously “mild” regions should consider installing roosting boxes as climate shifts make traditional survival strategies unreliable.
Provincial ministries across Canada have begun incorporating backyard roosting box programs into biodiversity conservation strategies. The Ontario Ministry of Natural Resources now includes winter roosting habitat in their Species at Risk recovery planning for certain woodpecker populations. This governmental recognition elevates roosting boxes from hobby-level bird feeding to legitimate conservation tools that measurably support wildlife populations through habitat loss.
The Canadian Wildlife Service’s research on urban heat islands reveals another dimension: cities stay 2-5°C warmer than surrounding rural areas during winter nights, creating thermal refuges where properly-positioned roosting boxes experience significantly less cold stress than the regional average would suggest. This means urban and suburban Canadian birders can support disproportionately large overwintering populations by providing adequate roosting infrastructure in areas where birds already benefit from ambient urban warmth.
Critical Winter Monitoring: When to Check Your Roosting Boxes
Established wisdom says avoid disturbing birds during winter, and that’s generally sound advice—except when checking could prevent mass mortality. The right time for a quick external inspection is late afternoon on sunny days between cold snaps, typically January and February in most Canadian regions. You’re not opening the box but examining the entrance for ice blockage, checking that wind hasn’t damaged mounting, and looking for predator activity signs.
Ice blockage kills more roosting birds than most Canadians realize. When daytime temperatures rise above freezing but nighttime drops well below, any moisture around the entrance freezes solid overnight. Birds trapped inside a sealed roosting box either suffocate from oxygen depletion or freeze because they can’t escape to forage the next day. A five-minute inspection that spots ice buildup and gently removes it can save an entire communal roost group.
The evidence you’re looking for during inspections tells you whether boxes are being used. Snow around the entrance should show disturbed areas where birds have landed and departed. The entrance itself should be clean of ice and spider webs (spiders don’t survive in actively-used boxes). If you have multiple boxes positioned across your property, you might notice usage patterns—some boxes heavily used while others sit empty depending on wind direction and solar exposure.
Track which boxes see consistent use and which get ignored. This data informs your next-season positioning strategy. I maintain a simple chart noting box location, occupancy evidence, and nightly temperature—over three winters, clear patterns emerge showing which mounting locations perform best. These aren’t random occurrences but predictable results of microclimate effects you can exploit by repositioning underperforming boxes.
One controversial monitoring approach involves very brief interior inspections mid-winter during warm spells when birds are out foraging. Opening a box for 30 seconds allows you to assess bedding moisture (too damp indicates poor drainage), check for dead birds (happens occasionally and attracts predators), and verify the insulation layer hasn’t been displaced. This is invasive enough that I don’t recommend it for casual birders, but serious monitors managing extensive roosting box networks find the information valuable for preventing larger problems.
Modern technology offers non-invasive options through small wireless cameras installed inside roosting boxes. Canadian birders have successfully used these to document communal roosting behaviour, identify species using boxes, and monitor for parasites or disease without disturbing birds. The cameras need cold-rated batteries and careful installation that doesn’t reduce usable interior space, but they provide extraordinary insight into what actually happens during those 15-hour winter nights.
Frequently Asked Questions
❓ Can I use the same birdhouse for nesting in summer and roosting in winter across Canada?
❓ How many chickadees or nuthatches can safely share one roosting box during Canadian winters?
❓ When should I clean out my birdhouse to prepare it for winter roosting in Canada?
❓ Do roosting boxes really help birds survive harsh Canadian winters below -30°C?
❓ Should I add a heater or heat source to my winter birdhouse in Canada?
Final Thoughts: Your Role in Canadian Bird Conservation
Preparing birdhouses for winter represents far more than seasonal maintenance for Canadian property owners—it’s active participation in wildlife conservation during our increasingly unpredictable climate. The chickadees and nuthatches using your roosting boxes aren’t abstract statistics but individual birds whose survival depends on the choices you make this fall. That $35 roosting box properly positioned and winterized could sustain 4-6 birds through 150 nights of Canadian winter, representing thousands of bird-hours of shelter you’ve provided.
The transformation from summer nest box to winter roosting shelter demands attention to details that matter differently in Canadian climates than temperate regions. Our extreme cold, extended photoperiods, and climate variability create unique pressures where minor preparation oversights translate to bird mortality by February. Yet the solutions aren’t complicated or expensive—they require understanding what birds need and committing 45 minutes per box to proper fall preparation.
As climate patterns shift and urban sprawl removes natural roosting cavities, the backyard roosting boxes we provide become increasingly critical infrastructure supporting cavity-nesting bird populations. Government conservation programs now recognize winter shelter as a limiting factor for species persistence in human-modified landscapes. Your individual contribution might seem small, but aggregated across thousands of Canadian properties, these roosting boxes create a distributed shelter network that demonstrably supports stable overwintering populations.
The satisfaction of watching chickadees emerge from your roosting box on a -25°C January morning, knowing you’ve provided the shelter that got them through the night, connects you directly to the natural cycles that define Canadian seasons. This isn’t passive observation but active participation in the ecology of your property. The birds don’t care whether you spent $30 or $70 on their roosting box—they care whether it kept them warm enough to survive until spring.
Start now if you haven’t already. Late September through October is your window for proper fall birdhouse cleaning guide work and roosting box conversion. By November, birds will have established roosting patterns and won’t readily switch to boxes that weren’t ready when they were searching. The birds that depend on your preparation don’t have the luxury of waiting for you to get around to it eventually—winter is coming, and their survival timeline is non-negotiable.
Recommended for You
- 7 Best Tips for Setting Up Birdhouses Spring 2026 Canada
- 7 Best Bird House Sanitizer Safe Products Canada 2026
- Tree vs Pole Mount Which is Better? 7 Expert Tips (2026 Canada)
Disclaimer: This article contains affiliate links. As an Amazon Associate, I earn from qualifying purchases. If you purchase products through these links, we may earn a small commission at no additional cost to you.
✨ Found this helpful? Share it with your friends! 💬🤗